Creating professional-looking paper signs is both fun and easy. Choosing a sign system that allows you to independently create your own paper inserts will also save you time and money. All you need to do it yourself is an inkjet or laser printer and a word processor such as Microsoft Word and you’ll have office signs in no time!
Sign maintenance can be expensive especially if you have a large number of employees where titles change and people come and go. Not only is it cost effective but it’s immediate. You don’t have to wait days or weeks for the local sign company or printer to create your paper insert signs. Creating paper signs yourself also ensures signage consistency which may be problematic if either the sign company experiences turnover or cannot find your templates or proofs from the previous paper insert signs they created.
Since Microsoft Word is common to most businesses we will provide the step-by-step process, complete with illustrations, as to how you can do paper inserts yourself without leaving the office. We’ll also show you variations you can use in creating your paper inserts understanding that there are numerous variations in addition to what is shown here. Once you understand the core concepts you can become as creative as you desire in creating paper insert signs tailored specifically to your organization or business. Photoshop, Illustrator and numerous other software design packages and word processors can be used in creating paper signs in addition to Microsoft Word. For purposes of illustrating the flow and we’ve selected MS-Word since it is readily available and easy to use and a sample sign frame similar to the WFP10U. The instructions listed below may vary depending on the version of MS-Word you have installed.
Creating Paper Inserts with MS-Word
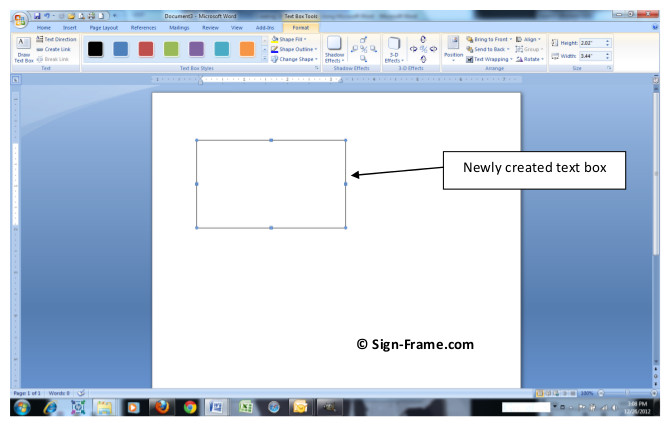
Step 2: Click the Insert Tab. Then click the Text Box icon in the Toolbar. At the bottom of the window click Draw Text Box.Move your cursor to the document (you will see a “+” sign appear) and drag it diagonally across the drawing surface while holding down the left-click button on the mouse.
Step 5: Now you can add your text. Add one or more text boxes to your paper signs by clicking the Insert tab and selecting “Draw Text Box” like you did in Step 2. Position the text boxes on the background and choose the font, font color and font size that you desire. In order to eliminate the text box outline click the Format tab -> Shape Outline -> No Outline and now you have just the text. To blend in your text box with the background you’ve chosen, highlight the text box -> right click the text box -> select Format Text Box from the drop down menu -> under Colors and Lines set Transparency to 100%. You can also use the Color dropdown and select the color, texture or pattern to match the background you’ve already selected.Here is the insert that we’ve created. Simply print it on your office printer, cut it out and insert it into your office sign. Printing paper signs will save you time and money and improve the overall look of your office environment.


