It’s a snap to make signs using paper inserts and transparencies and we’ll show you how you can do it while saving time and money in the process. This particular article describes how to combine paper signs, transparencies and acrylic covers into elegant office signs similar in size to the WFP1U. It also provides alternatives in creating paper insert signs depending on your needs and where you stand currently with your sign program. If you’re looking for detailed instructions on how to make these component parts check out the article Create Photo and Logo Paper Signs in our How To section.
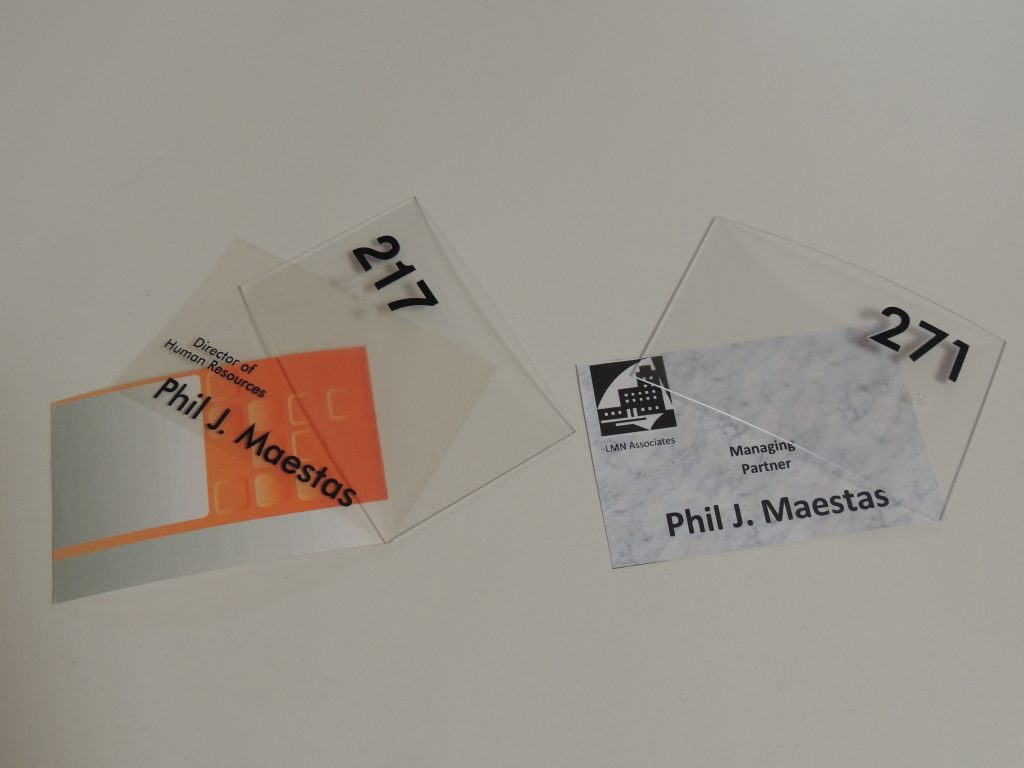
The photo below illustrates two types of paper insert signs. The one on the left is composed of a paper insert, a printed transparency and an acrylic cover (217) with Braille and tactile letters. The one on the right consists of a paper insert and an acrylic cover (271) with Braille and tactile letters.

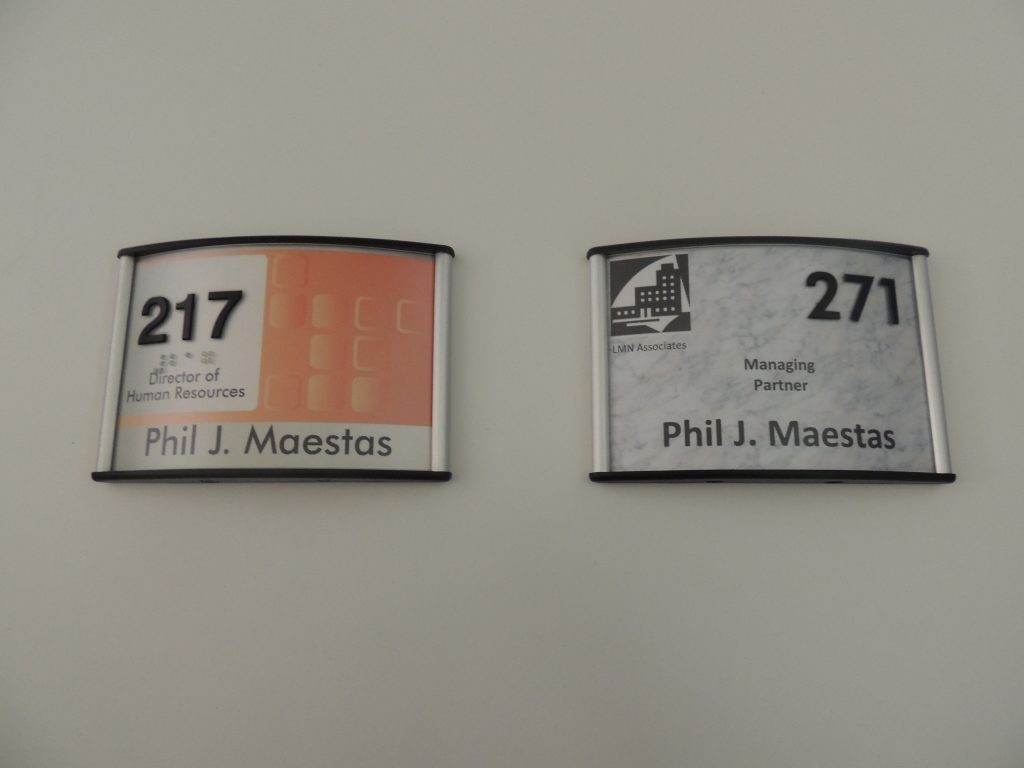
Here’s what the paper signs and transparencies look like when assembled and placed in sign frames.
As you can see, the paper inserts drive the look of the sign. As you can also see, it isn’t mandatory that you make signs that include transparencies since when you put the components together it isn’t discernible which is which. So why would one do it? Here are some tips on that front and some other considerations regarding paper inserts should you decide to make signs on your own.
Outsource Your Paper Inserts to a Local Printer
The answer to the above question regarding the use of transparencies may lie with the quality of paper inserts you desire, the amount of time you have to dedicate to printing paper signs and the number of employees you have. If you want high-quality paper insert signs and have a relatively large number of employees it is more cost effective to outsource the printing of your paper insert signs (with a few extra of course). That means that when an employee’s title or name changes or when new hires come on board all you do is print the transparency and insert it into the sign frame. In fact, depending on the pricing from your local print shop and the number of signs you need to print it may be to your advantage to outsource the initial printing of the transparencies too. In any case, maintaining your signs going forward will only entail printing the transparencies.
Forget the Paper Signs and Just Print on Transparencies
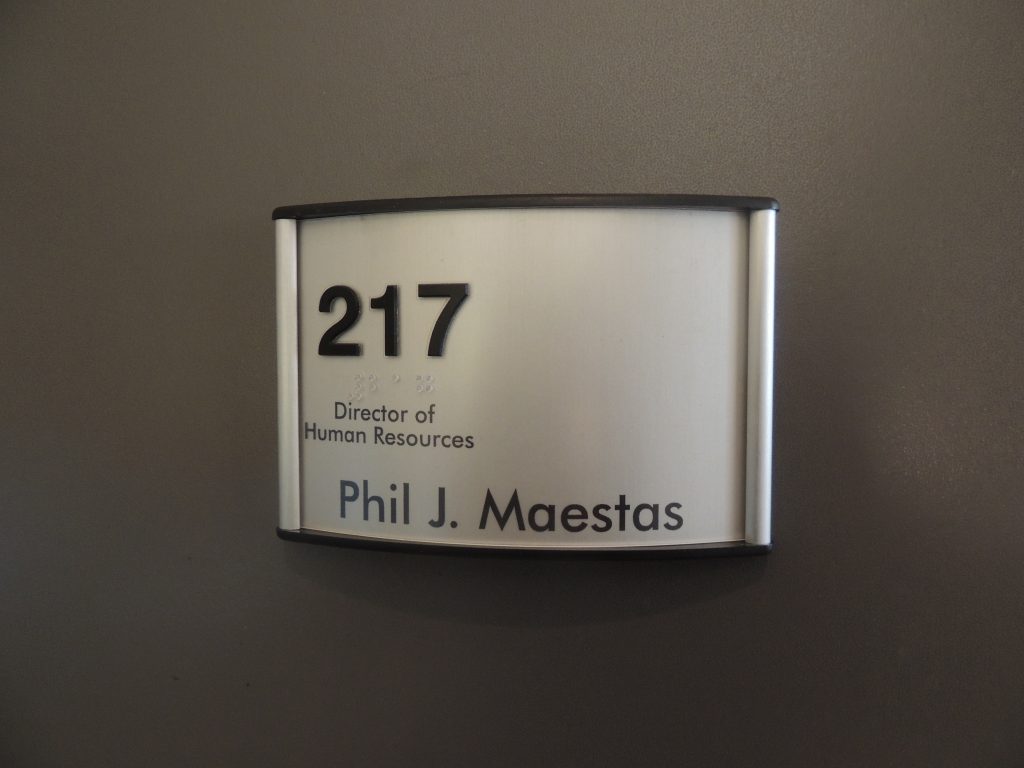
A number of clients, especially in the financial services and legal professions, preferred the natural beauty of the brushed silver and gold frame faces to accent their office interiors. They decided to forego the paper insert signs and chose to make signs using only the transparencies – and they looked great. Here’s an example so you can visualize the concept even though this particular layout was designed for use with a paper insert.
I simply removed the paper insert from the above example and just used the transparency with the clear cover. You can now see the elegant anodized, brushed silver face through the two overlays. The same holds true for the gold frames yet both finishes look exceptional adding a classic feel to any office or campus interior design.
Whether using paper, transparencies or some combination thereof, hopefully you can see that you can make signs just like the professionals in minutes. It’s fast, fun, cost effective and you can do it all yourself. Please send us your designs at [email protected] so our readers can benefit from your creativity.


